Office Scripts
Office Scripts in Excel is a new feature in Office365 that allows you to Automate your day-to-day tasks using power automate
 |
- You can record your Excel actions with the Action Recorder, which creates a script.
- You can also create and edit scripts with the Code Editor. Your scripts can then be shared across your organization so your coworkers can also automate their workflows.
- TypeScript is a superset of JavaScript.
- Every script runs the code in a single main method.


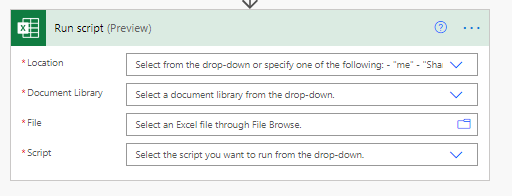
- Your organization must have enabled Office Scripts via the switch in the Office Admin Portal
- Your organization must have enabled Power Automate and the Excel Online (Business) connector
- Go to the Automate tab and select All Scripts.
- Select New Script.
- Create script
- Rename the script to . Press the script name to change it.
- Save the script by pressing Save Script.


Format a Table
Below script used to format a table with excel data
function main(workbook: ExcelScript.Workbook, sheetName: string)
{
tableRowRange: workbook.getWorksheet(sheetName)
workbook.getWorksheet(sheetName).addTable(workbook.getWorksheet(sheetName).getRange('A1').getSurroundingRegion(), true);
workbook.setIsDirty(true)
}
Get Column Names
Below script used to get excel header column details
function main(workbook: ExcelScript.Workbook, rangeAddress: string): string {
let sh = workbook.getFirstWorksheet();
let rg = sh.getRange(rangeAddress)
return JSON.stringify(rg.getValues());
}
Format a table without a header columns
function main(workbook: ExcelScript.Workbook, sheetName: string, )
{
tableRowRange: workbook.getWorksheet(sheetName)
workbook.getWorksheet(sheetName).addTable(workbook.getWorksheet(sheetName).getRange('A1:AY70'), false);
// 'A1:AY70' refers to columnrow
workbook.setIsDirty(true)
}
Delete empty row
function main(workbook: ExcelScript.Workbook) {
  let selectedSheet = workbook.getActiveWorksheet();
  let table = selectedSheet.getTables()[0];
  let tableDataRange = table.getRangeBetweenHeaderAndTotal();
  let dataValues = tableDataRange.getValues();

  let removed = 0;
  // Important that you go from bottom to top to account for removing correct rows.
  for (let i = dataValues.length-1; i >=0 ; i--) {
    let [event, date] = dataValues[i];
    if (event === '' || date === '') {
      // tableDataRange.getRow(i).getFormat().getFill().setColor('Yellow');
      table.deleteRowsAt(i);
      removed++;
    }
  }
  console.log(`Removed ${removed} rows.`)
}